Quick Reference: What is the AVer F50+
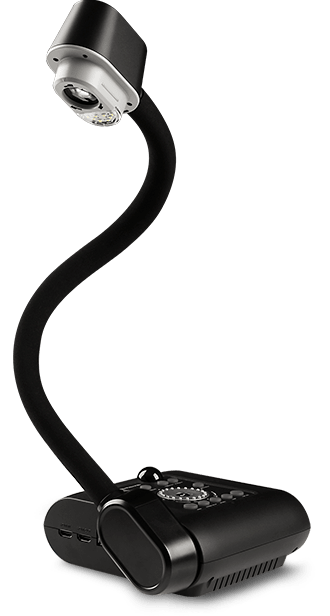
- The AVer F50+ is a “visualizer” / document camera — a device to project physical documents, books, paper, three-dimensional objects, etc., onto a screen or computer. Manuals++2AVer USA+2
- It offers a flexible (gooseneck) arm to aim at materials, and supports output at up to 1080p / 30 fps. AVer USA+1
- It can connect directly to displays/projectors (via HDMI, DVI-I, or video outputs) or to a computer (via USB) for streaming, recording, or integration with conferencing/recording software. AVer USA+2AVer USA+2
- It includes a built-in LED light to illuminate documents, and a built-in microphone (or the option to plug in an external mic) — useful for recording or livestreaming lectures. AVer USA+1
Recording, Annotating & Additional Features
- Recording video (with audio): Insert a USB flash drive (2 GB–64 GB, formatted FAT32) OR an SD card (1 GB–32 GB) into the F50+. Set the USB/ storage switch appropriately, then press the Record button. Videos are saved in .AVI format. AVer USA+1
- Annotation (on captured images): Connect a USB mouse to the F50+ (set the USB switch to “USB”). Use the “Image” button to browse captured images, select one, then annotate (freehand or lines), choose color/thickness, erase if needed, etc. The annotated version is saved as a new file — original remains intact. AVer USA
- Mic / Audio: The F50+ has a built-in mic. For better audio quality (lectures, voice-overs), you can connect an external mono mic to the F50+; this disables the built-in mic. AVer USA+1
Common Troubleshooting & Tips
|
Issue
|
What to Check / Solution
|
|
No image on screen
|
Ensure power is ON (blue LED), check cable and input channel; verify display supports 1024×768 (default) or adjust resolution; ensure side panel “TV/RGB” switch matches display type. AVer USA+1
|
|
Dark or dull image
|
Turn on built-in LED light; ensure room lighting is adequate; adjust Brightness/Contrast in Menu; or reset to default (Menu > System > Default). AVer USA
|
|
Blurry or out-of-focus image
|
Press “Auto Focus” on control panel or remote. AVer USA+1
|
|
USB flash drive not recognized for recording
|
Make sure drive is FAT32 formatted, between 2 GB and 64 GB; set USB switch to storage mode correctly. AVer USA+1
|
|
External display shows distorted or wrong desktop when switching from PC mode
|
If connected to laptop, after switching to PC mode use display settings: extend or clone desktop, adjust graphics output (e.g., via “FN + F5” or vendor-specific keys). AVer USA
|
Resources — Official Documentation, Manuals & Videos
- F50+ Support Page (Downloads, FAQ, Videos): AVer’s official support hub for F50+ (manuals, software, firmware, FAQs). AVer USA+1
- F50+ User Manual (PDF, ~320 pages): Very detailed — covers setup, connections, OSD menu, advanced features, troubleshooting, and specs. Manuals+
- F50+ Quick Start Guide / Quick Manual: Good if you just want minimal startup instructions. ManualsLib
- “Setting Up Your AVer Document Camera From Home” Guide: Useful if you plan to integrate the F50+ into remote or hybrid teaching (Zoom, Teams, etc.). Manuals++1
- Intro Video — “F17+ & F50+ Visualizers”: An overview video by AVer showing how the F50+ (and F17+) works, its flexible arm design, and typical classroom use cases. presentation.aver.com
Suggested Workflow (for Faculty / Classroom Use)
You might include the following workflow in your faculty KB / SOP for classroom use of F50+:
- Before class — connect F50+ to projector/display or to PC (if using digital slides or interactive annotation). Do a quick test: ensure camera image displays, focus/lighting are set.
- During class — place documents, book pages, student work, etc. under the camera head; use LED if needed; rotate the flexible arm as needed; optionally annotate using PC + A+ Suite.
- After class (optional recording) — if you recorded video, remove the USB flash drive & save the .AVI file to your media library; annotate images if needed; label and store for future reference.
- Post-class maintenance — return camera head to holder, turn off power, disconnect cables appropriately if using shared carts; store F50+ safely (gooseneck arm is flexible but should be handled carefully).
Setup & Connection
What’s in the Box / Pre-check
- Ensure you have the camera base + flexible arm + camera head, power adapter, and USB cable (if you intend to connect to a PC).
- Confirm that the output cables (HDMI, DVI, VGA/RGB, etc.) correspond to your projector/display inputs.
Connecting to a Projector / Display (Standalone)
- Plug in the power adapter into a wall outlet, connect it to the F50+, and press the power button. On first press it goes into standby; press again to power on. Manuals++1
- Use the appropriate output (HDMI, DVI-I, RGB/VGA, or RS-232/COM — though RS-232 is optional/advanced) to connect to your display or projector. ManualsLib+2AVer USA+2
- If using HDMI via a DVI-to-HDMI cable, note that DVI-I output may not be compatible with all HDMI displays — test ahead of class. AVer USA
- Position the flexible arm/camera over the document or object you want to display; use the built-in LED light if needed.
Connecting to a Computer (for recording, streaming, annotation, etc.)
- Download and install the appropriate software: the preferred modern software is A+ Suite (for Windows or Mac). AVer USA+1
- Connect the F50+ to your computer using the supplied USB cable. Manuals++1
- In A+ Suite (or the alternative supported software), select the visualizer/camera icon and choose the F50+. Once selected, you should see the live video output from the document camera. Manuals++1
- If using a Chromebook, they support a lightweight version called Sphere Lite. Manuals++1
💡 Tip: Our institution uses hybrid/remote teaching (Zoom, Teams, etc.), so you can also set up the F50+ as a USB “document camera” input to broadcast physical documents or handwritten notes during live online classes.